One of the goals for my next game is to release everywhere I possibly can, one of the platforms I am targeting is iPhone/iPad. I chose to build my game in sokol and odin, both of which have support for this, but the sokol samples at the moment are a bit outdated on iOS and end up not filling the whole screen. After playing around for a while I got my game running in a state I am happy with, so I’m documenting my method here. This might prove helpful if you are using something other than sokol but I can’t guarantee it, and a lot of libraries, such as raylib don’t support iOS at all.
The general technique is to create an xcode project with the metal framework, and link this with generated odin objects.
Setting up the xcode project
First create a new project in xcode. Select the iOS game template, and then set the language as Objective-C and Metal.

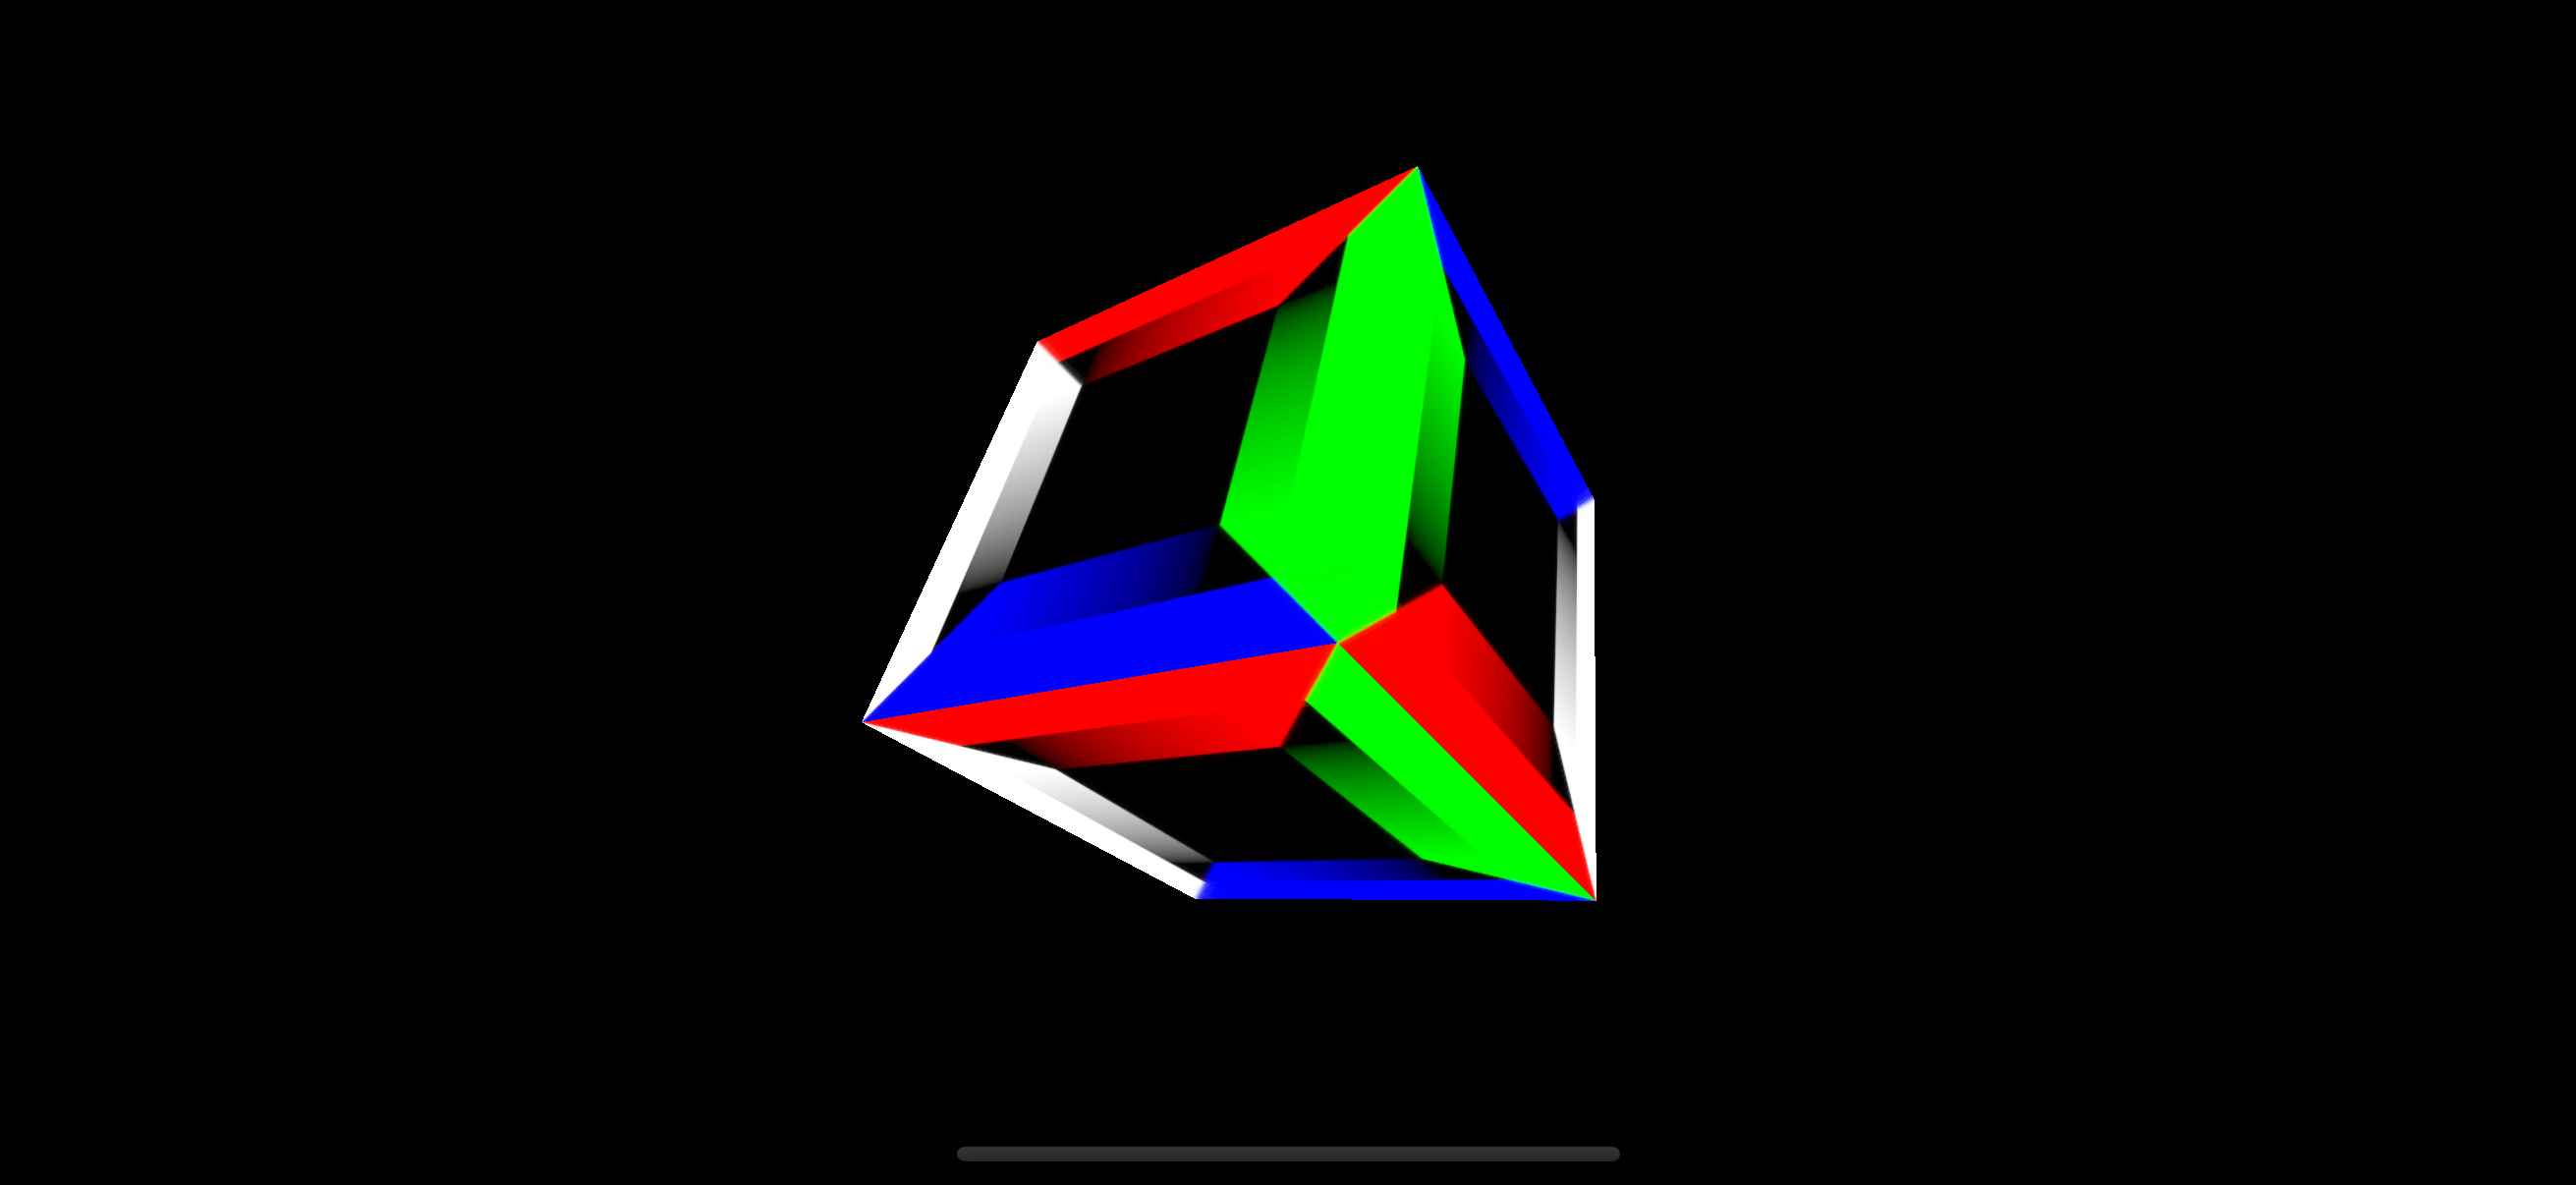
When you run this project from xcode on an iphone simulator you should see a spinning cube.
We can clean up some of the code for the spinning cube that xcode generated by default. Delete the files Renderer.m, Renderer.h, GameViewController.m and GameViewController.h. We can delete all the code in main.m as we are going to replace it later.
Compiling odin code
Next compile your odin project for iOS. We are going to build our code as object files, and then add them to the linking process within xcode.
Make sure your odin code has a main proc that calls into sapp.run from sokol. Then for compiling there are two sub-targets you can use, iphone and iphonesimulator. You need to make sure you compile for the target you are going to run on as they are not interchangeable, iPhone code doesn’t work in the simulator and vice versa.
Example for iPhone:
1 | odin build src -target:darwin_arm64 -build-mode:obj -subtarget:iphone -out:build |
Example for the simulator:
1 | odin build src -target:darwin_arm64 -build-mode:obj -subtarget:iphonesimulator -out:build |
This should generate a bunch of .o files in the build directory which we now need to link with our xcode project.
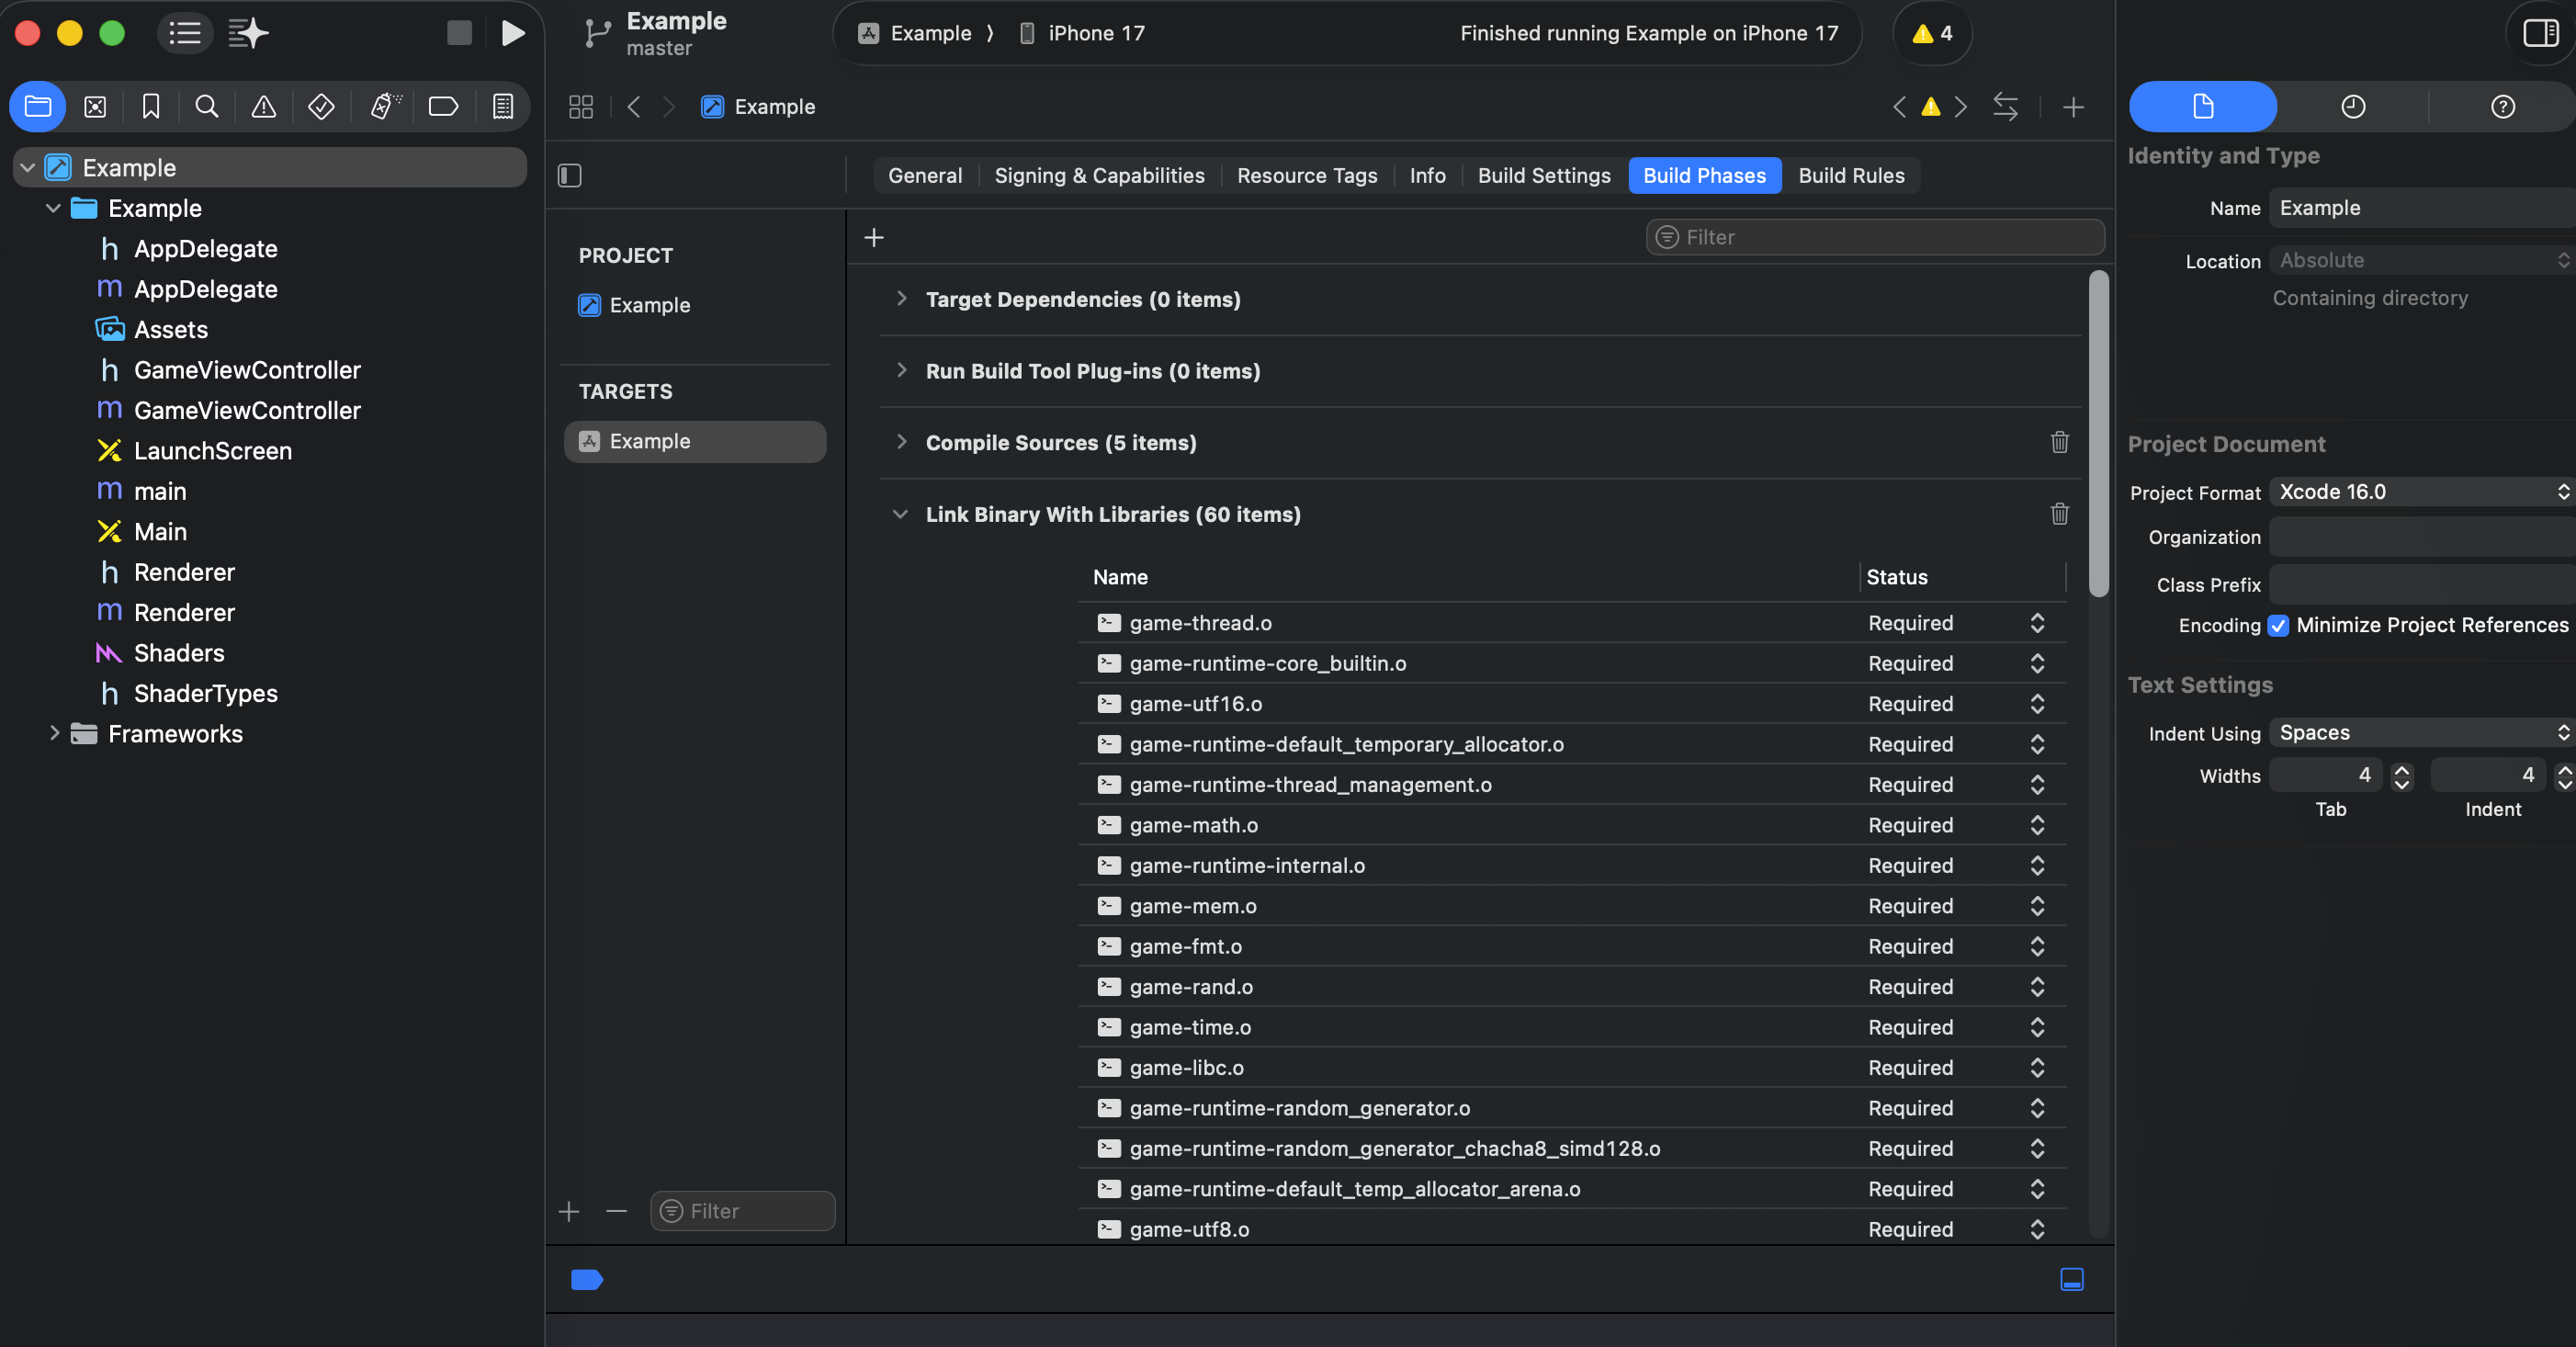
In xcode click on your project (the top item in the lefthand sidebar), select Build Phases then expand “Link Binary With Libraries”, then from finder click and drag all the generated object files over.
Building sokol
We have linked our odin code with our project now, but this doesn’t include the actual implementation of sokol. To add sokol we need to find the sokol header files we want, in my case app, gfx, log, glue, and audio. You can get these from the official sokol repo. Copy them somewhere in your xcode project. We then want to update the main.m file to import them and define headers telling sokol to build for metal. Delete the content of main.m and replace it with something like
1 | #define SOKOL_IMPL |
As we have no main function, and are not using sokol as the entry point, the main function from our odin code will be called. Now if you launch your game in the simulator you should see it boot up.
Extra notes
Updating the object files
If this works at first but then later starts failing to build it may be because the amount of object files outputted from the odin compiler has changed. You will need to go in and re-add all them to the Build Phases step in xcode. This gets tedious but in reality I’m just compiling for iOS on major releases, not every time I make a change.
Apple developer account
If you want to build for a real iPhone and not the simulator you will need an apple developer account and to add your team to xcode.
Safe area
Modern iPhones have very round edges, and a notch/camera island, you probably want to avoid drawing important game stuff behind them. To do this I have a small function I use to get the safe area. I define it by adding this it to my main.m file in xcode
1 | #import <UIKit/UIKit.h> |
and use it in my odin code like so
1 | import "core:c" |